Security
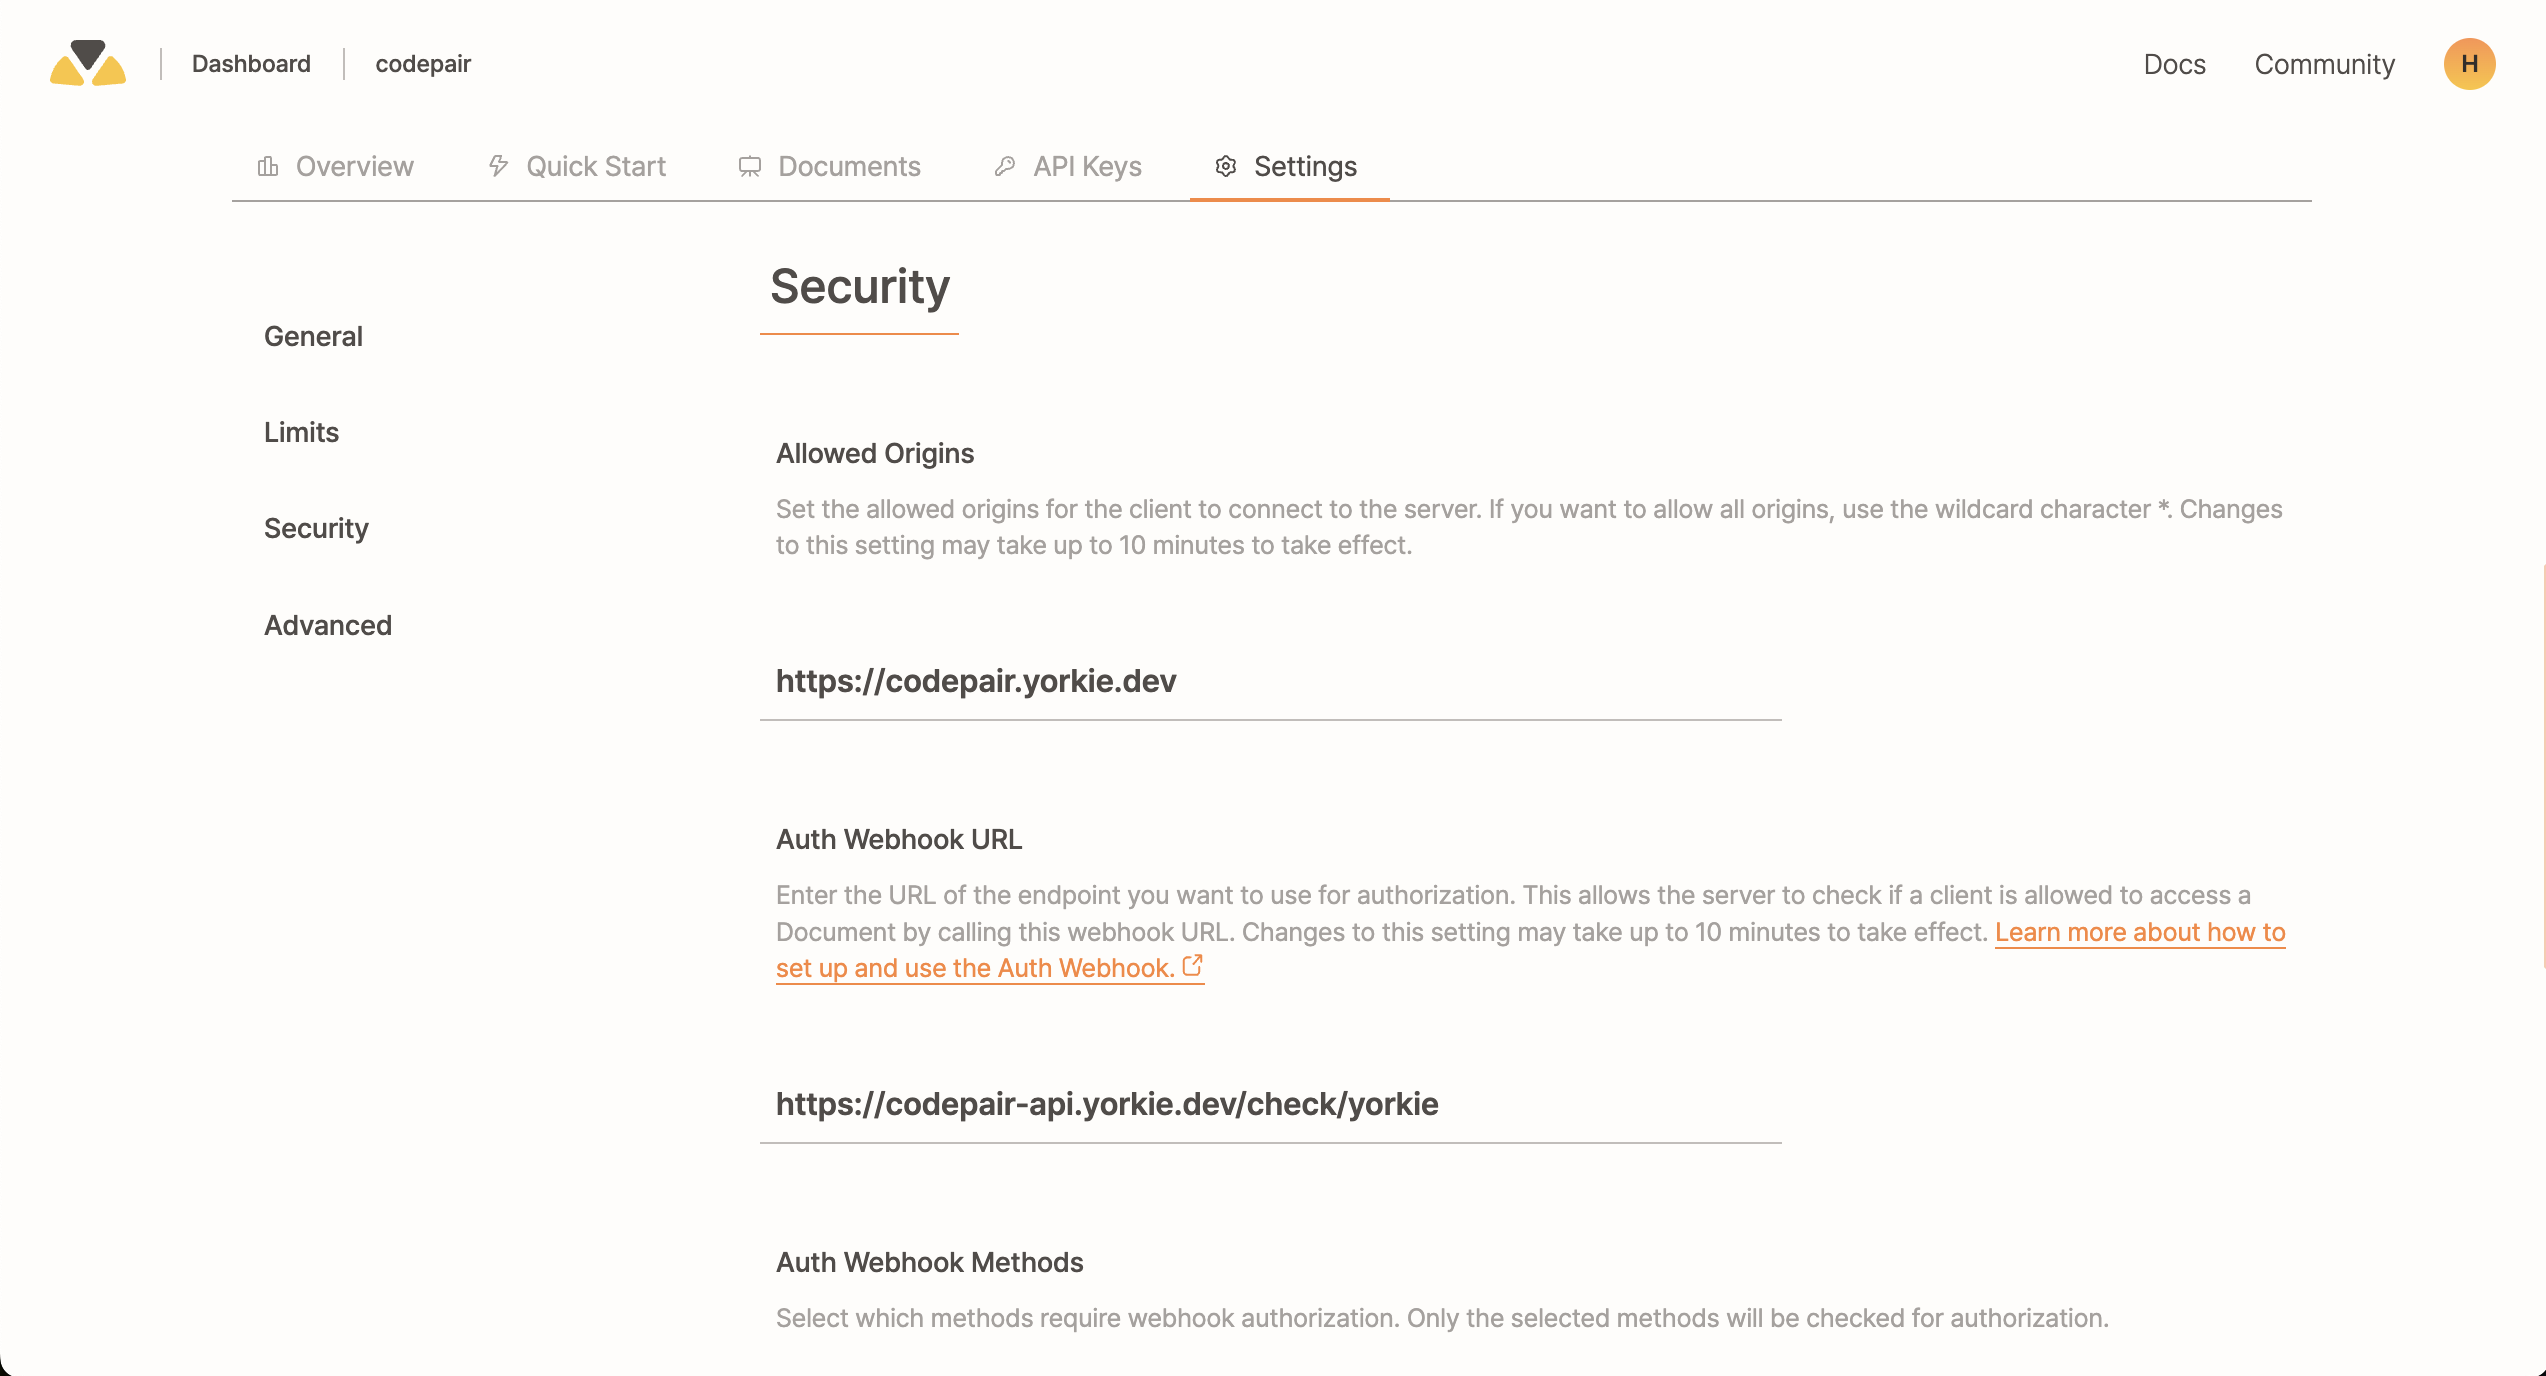
Allowed Origins
By default, Yorkie allows requests from any origin. To enhance security, you can restrict access to specific domains by configuring the allowed origins.
Each project in Yorkie can have its own allowed origins settings, which can be managed through the Dashboard.
Configuring Allowed Origins
- Open the Project Settings page in the Dashboard.
- Navigate to the Security section.
- Specify the domains that should be allowed to access your Yorkie server.
Auth Webhook
The Auth Webhook provides fine-grained access control by validating client requests through an external authentication server. This allows you to enforce custom authorization logic, ensuring that only authorized users can access and modify Yorkie documents.
(5) Response (4) Handle request┌─────────────────┐ ┌──┐│ │ │ │ (3) Response▼ │ ▼ │ - allowed┌──────┐ ┌┴─────┤ - reason ┌───────────────┐│Client├────────────►│Server│◄──────────────┤External Server│└──────┘ (1)Request └────┬─┘ └───────────────┘- token │ ▲- dockey └──────────────────────┘(2) Call webhook- token- dockey- verb: r or rw
The authentication process follows these steps:
- The client sends a request with an authentication token.
- The Yorkie server forwards the request details to the webhook server.
- The webhook server validates the request and sends a response.
- Based on the webhook response, Yorkie either processes or rejects the request.
- The final response is sent back to the client.
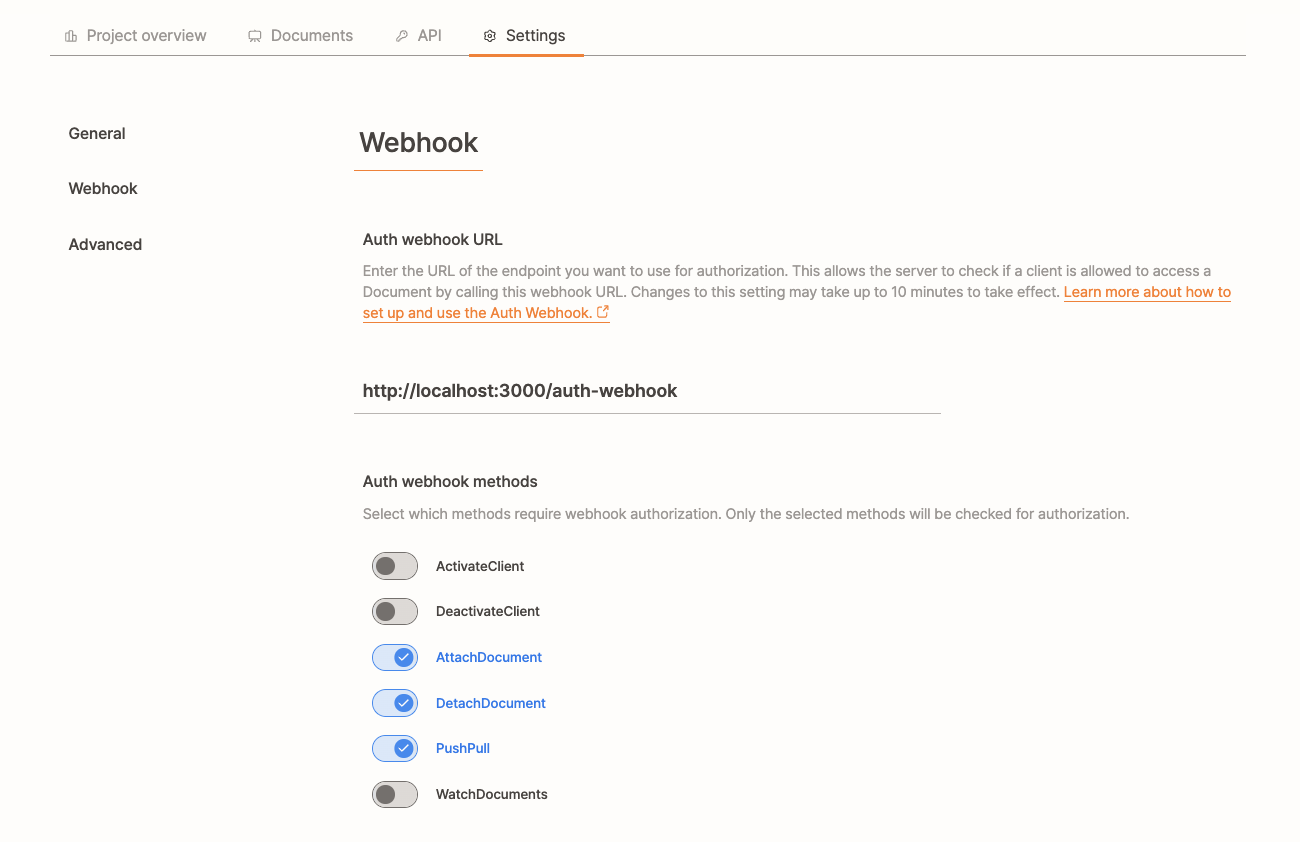
Setup and Configuration
1. Configure the Auth Webhook
You can easily set up the Auth Webhook via the the Dashboard:
- Go to the Project Settings page.
- Set the webhook URL and define which methods require authentication.
Alternatively, you can configure the webhook using the Yorkie CLI. See updating the project for details. Refer to the updating the project.
2. Client Configuration
To provide authentication tokens dynamically, use the authTokenInjector option when creating a Yorkie client:
1const client = new yorkie.Client({2 rpcAddr: 'https://api.yorkie.dev',3 authTokenInjector: async (reason) => {4 // Handle token refresh logic based on webhook response5 if (reason === 'token expired') {6 return await refreshAccessToken();7 }8 return accessToken;9 },10});
If an authentication error (codes.Unauthenticated) occurs, the authTokenInjector will be triggered again with the webhook's response reason, allowing the system to refresh the token.
3. Webhook Request Format
When a client makes a request, the Yorkie server sends the following JSON payload to your webhook server:
{"token": "SOME_TOKEN", // Token from authTokenInjector"method": "PushPull", // Method being called: ActivateClient, DeactivateClient, AttachDocument, DetachDocument, WatchDocuments"documentAttributes": [{"key": "DOCUMENT_KEY", // Document key"verb": "r" // Access level: 'r' or 'rw'}]}
4. Webhook Response Format
The webhook server should return a JSON response in the following format:
{"allowed": true, // Authorization decision"reason": "ok" // Optional explanation}
HTTP Status Codes:
200 OK: Request is authorized401 Unauthenticated: Token is invalid or missing403 Permission Denied: Token is valid but lacks required permissions
5. Error Handling and Recovery
Yorkie handles authentication failures based on the webhook response and HTTP status codes:
| Status Code | Meaning | Action Taken |
|---|---|---|
| 200 OK | Request is authorized (allowed: true) | The request proceeds normally |
| 401 Unauthenticated | The token is invalid or missing (allowed: false) | Yorkie attempts to refresh the token via authTokenInjector |
| 403 Permission Denied | The token is valid but lacks the required permissions (allowed: false) | The request is rejected with codes.PermissionDenied |
Token Refresh & Retry Behavior
For PushPull(realtime sync) and WatchDocuments:
- Yorkie automatically retries the request after refreshing the token.
- Notifies via
document.subscribe('auth-error')
For other API calls:
- The system does not automatically retry; the client must manually handle the
codes.Unauthenticatederror and retry the request.